Monday, 7 April 2014

How To: False Lashes


Hello Beauties,


False lashes are that part of a makeup routine that most people skip over, because most seem to think that they can't pull them off, or just can't put them on. They're almost always a part of youtube tutorials and most beauty experts tend to skip over the application.


I just want to let you guys know that falsies can be done quickly, easily and correctly, whether you're a seasoned pro or just a lover of thick, lush lashes ;D


So, what are false lashes


Falsies, or fake eyelashes, come in many different shapes and styles. They are applied to the lash line of the eye to create the illusion of longer, fuller, and darker lashes. They are meant to blend in with your natural eyelashes. You can get simple natural looking ones for everyday use, dramatic full lashes, or flirty oddly shaped ones. You can even find lashes that are made of feathers, feature bright colour, or crazy patterns.


False lashes can be made out of synthetic (plastic) material, or natural hair. Less expensive lashes tend to be synthetic, they're easy to tell apart because they actually look a little shiny and are stiffer, Natural hair lashes look just like real eye lashes. They're usually made from treated, sanitary hair and blend in flawlessly with your natural lashes.


There are two main types of lashes - Band/ strip lashes and individual lashes. The two have very different application styles, but both are very doable.


Band False Lashes:


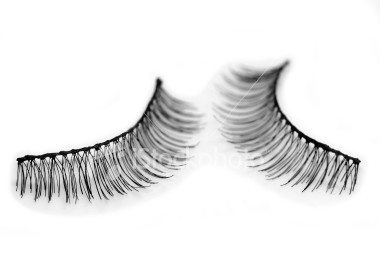
These are by far the most popular type of lashes because they're quicker and easier to apply to yourself. They are a full eye's worth of lashes, pre-attached to one another, making them easy to just glue and go.


Individual False Lashes:


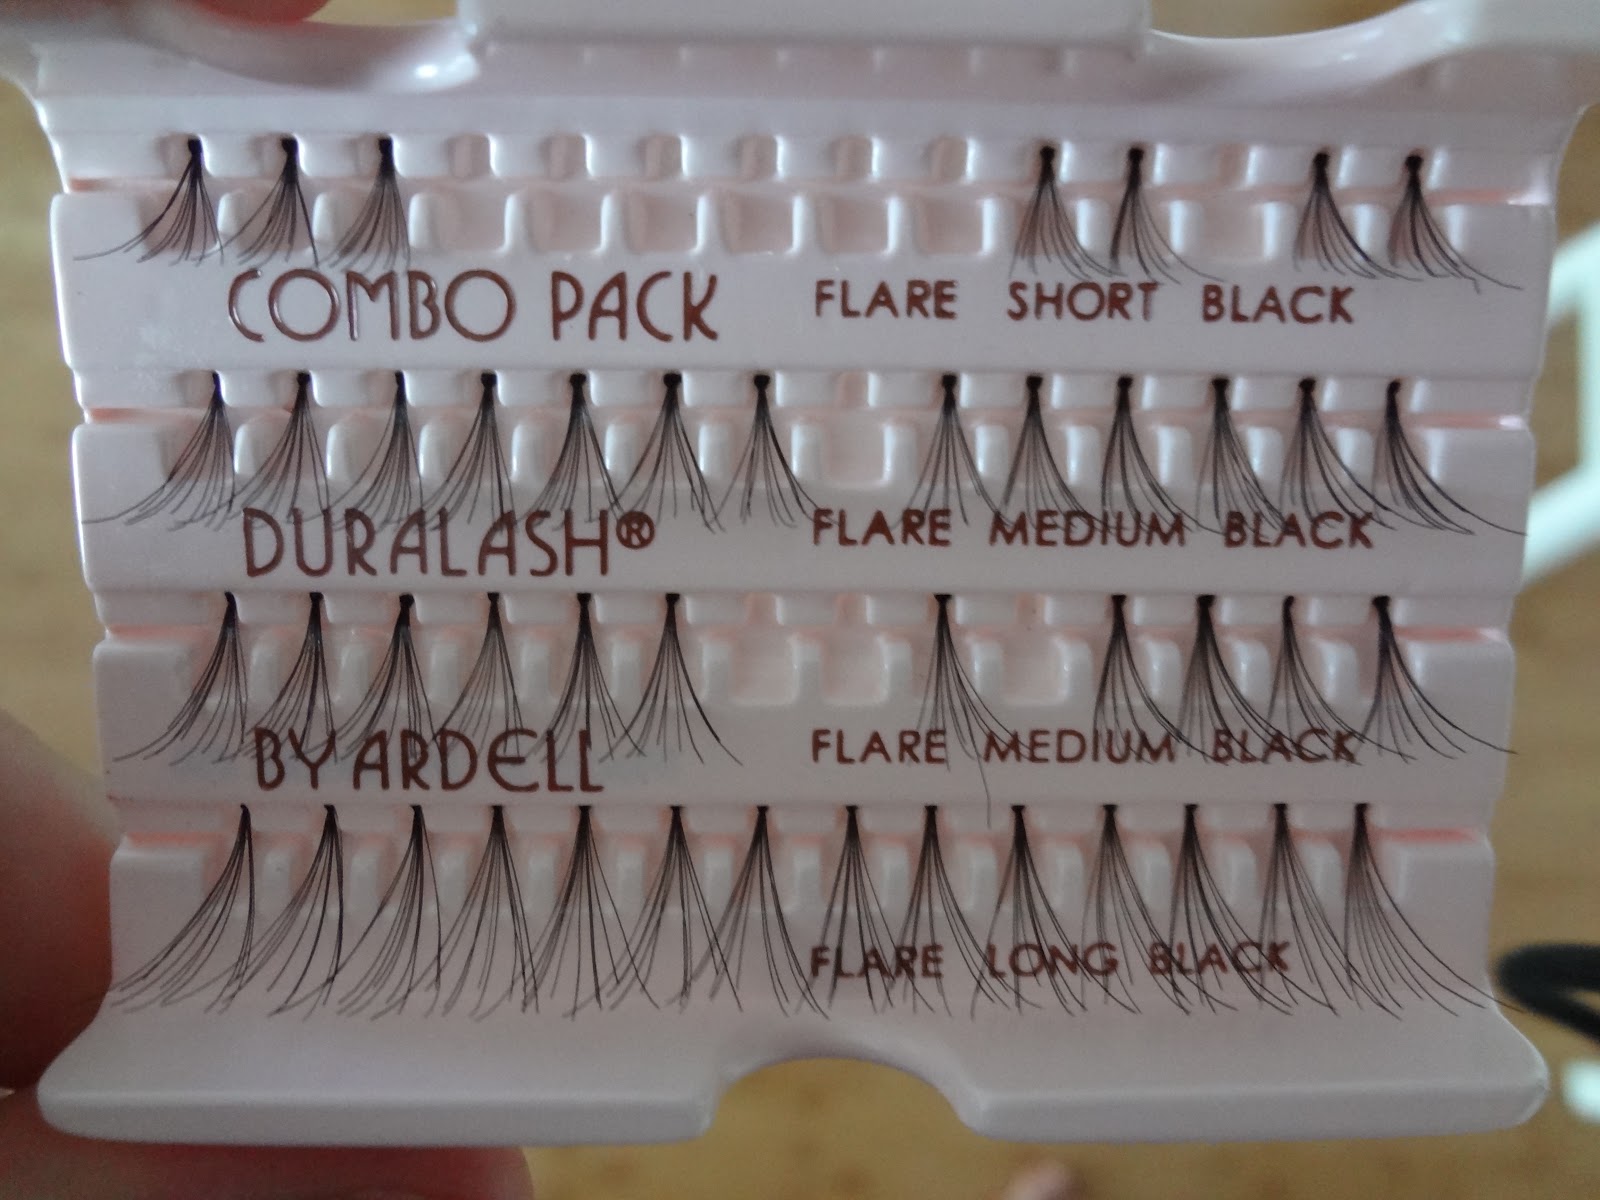
Individual lashes are ideal for occasions where you want the extra drama, but definitely don't want the look of a full band of false lashes. Each individual lash is a small clump of lashes stuck together, meant to be glued one at a time into the lash line for optimal blending. These type of lashes look the most natural, but are a lot more time consuming to put on yourself.


How do you Apply False Lashes ?


Applying falsies isn't something that you're going to be able to do perfectly the first time (just ask the girls I practiced on in my makeup application class) It's much better to practice a few times before being able to go out in public donning your new luscious lashes.


This is the way that I was taught to apply falsies, and I've found that it works well for most people.  


You Will Need:
  • Scissors
  • Eyelash glue
  • Black mascara
  • Eyelash curler
  • Tweezers


1. For strip lashes - You MUST measure and trim any excess off the band before you apply them. Not everyone has the same shaped eyes, this will help give you the best fit AND make your bank look the most natural.


2. Curl your lashes and apply a single even coat of mascara, this will make it easier to blend your natural lashed with the falsies. Take the lashes out of the package and curl them around your finger. This will make the band more pliable and easier to shape to your eye.


3. Lots of falsies come with eyelash glue (usually the glue is not the greatest though) make sure you double check to see if they set you picked does or does not BEFORE you get them home. There is nothing worse than getting home and finding out you have no way of attaching your lashes and starting your new adventure into lash town. You can usually buy inexpensive lash glue on it's own. When it's time to apply the lashes  I squeeze a small dollop of glue onto my makeup pallet and then grab the lashes upside down and run the band quickly through the glue. This usually coats the band in a thin even layer of glue. For individual lashes you'll want to use tweezers to dip the knot at the bottom of the group of hairs into the glue.  


4. Allow the glue to set on the lashes for about 15 seconds before you apply them to your eyes. This will allow the glue to become tackier and will help the lashes set faster.


5. With your fingers or tweezers if you're more comfortable with them, apply the lashes to the inner corner of your eye, as close to your natural lash line as possible. Applying on the inner corner makes it easier to follow the natural curve of your eye, and allows you to get as close as possible to your natural lashes.


6. Once the lashes are applied and have dried, use an eyelash curler on your natural and false lashed to blend them further, and add one more coat of mascara. This will help hold the curl and make sure the two stay blended together - Think like hairspray for your lashes.


(Individual lashes aren't as tricky to apply, even though the process takes  a little longer. You don't have to worry about measuring and trimming the lashes. Most people will apply a few individual lashes to their outter lash lines to make their eyes appear bigger without looking like it's to much. You can also use individuals on your lower lash line.)


Q&A


How do I remove falsies without yanking on my eyelids ?


Using a good eye friendly makeup remove is key. You don't always have to, but the tugging on the eyelid can be unpleasant for some people when they try to take their lashes off, Try using a makeup remover with oil in it, instead of an oil free formula. If you don't want to run out and buy another product,  try olive, or coconut oil. The natural oils will not cause any break outs, and a lot of people have them already in the pantry.


Can you Re-Use Falsies


Yes! you definitely can, as long as you remember to clean and sanitize them. You can get a lot of life out of your lashes, especially synthetic ones. Whenever you remove your lashes, just remember to remove all the makeup/ excess glue off of them, then give them a swipe with a q-tip that has been dipped in rubbing alcohol. Let them dry and then put them away for next time. You can use them until they literally fall apart ( and sometimes even after that...hello demi's)


My Favourites:


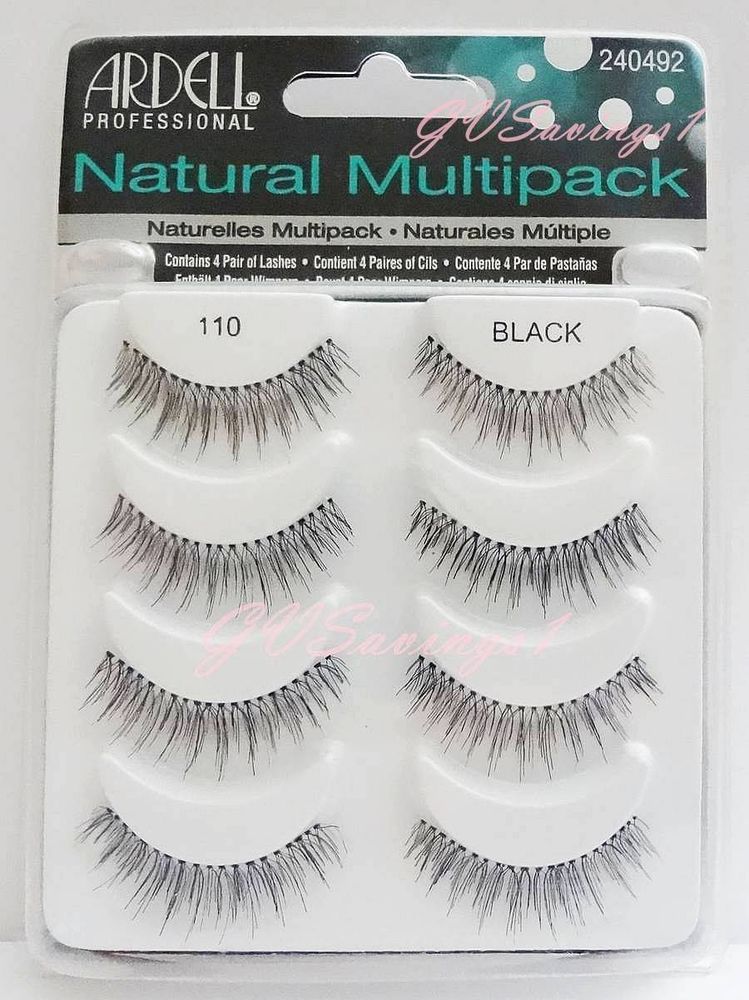
Some of my favourite falsies are made by Ardell, they have a HUGE variety to choose from, they really last AND are affordable.


For individual lashes I like the Ardell Duralash kit. The lashes can last up to 2 weeks with the special adhesive that is included in the starter kit.
My go to lash glue is DUO, it comes in a few different formulas, I like the formula that dries clear
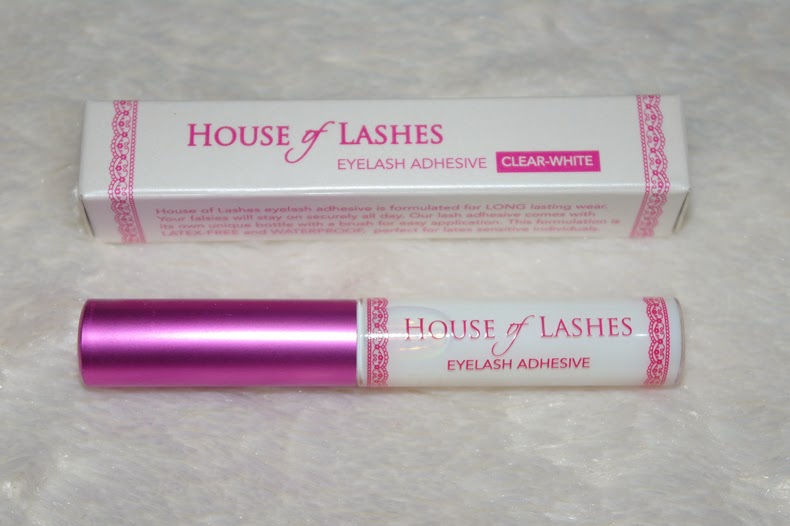
The house of lashes glue is also amazing, the brush applicator makes it very easy to apply just the right amount of glue to the band.


I hope that you all find this very helpful and that you enjoy your adventures into luscious lash town.


Stay Beautiful,


Danielle


Tuesday, 4 February 2014

Review Time - Bellato HD Skin Secrets Starter Airbrush Kit

Hello Beauties!!

I recently took the plunge and purchased an airbrush kit from Belletto Studio.
I found a great coupon code from one of the very talented makeup artist's that I follow on Instagram.  The coupon code gave me 50% off of any item on the site.

I started by reading some of the reviews that other people had posted and watched some videos on Youtube, then I went onto the website to look at what kind of systems that Belletto offers.  I decided to get the HD Skin Secrets Starter Kit, this particular kit includes:

  • Complete Belletto Studio HD Airbrush System
  • A mix of 4 Foundations, 1 Blush, 1 Bronzer or Highlighter pre-selected for you based on your skin tone.
  • Lifetime Manufacturer’s Warranty and Maintenance on Airbrush Wand
  • Belletto Studio Artist Support
  • One-Year Manufacturer’s Warranty
  • Quick Start Guide
  • Step-By-Step Tutorial DVD:
Learn to Airbrush
Basic and Advanced Makeup Applications
Contouring & Highlighting
Stencils for Face and Body
Cleaning and Maintenance
Airbrush Tanning


ORDERING


I found the website fairly easy to navigate and order from, adding the coupon code was a little strange, you have to go to a separate page to add the coupon to your order, and had I not been looking for it, I probably would have missed it entirely.

 I live in Canada, so there was only one option for shipping, but it was very reasonable. In total having used my coupon and added shipping, my total order was $92.50 (USD) which worked out to $104.50 (CND).

I was a little confused as to how long it would take for me to receive my order because no where on the site or in the confirmation e-mails does it mention shipping times, which I was a little worried about.

However I have to say my order arrived in really good time, I was very pleasantly surprised with how quickly it did arrive and they followed the special shipping directions I added perfectly.

UNBOXING


The box has a flap magnet closure, and on the inside of the lid there is a "periodic table of makeup" which is very helpful for mixing colours. All of the directions that come with the system are step by step and very easy to follow. 


First Impressions


The compressor is very compact and would be easy to carry, which is perfect for me as I travel to clients, and can now offer them airbrushing on the go.  The system is very easy to set up, and has three settings to choose from low, medium and high. There is no on / off switch, the compressor begins blowing as soon as the power cord is plugged in. 

The foundation covers really well, and feels incredibly light while still looking natural which I especially love.  The blush that was included with my system was not a colour I would really use, but it is still a beautiful blush colour for a different skin tone. 

Overall it is a very easy system to use and I am very happy with my new purchase. I would highly recommend it for anyone who is new to air brushing. 

★★ ★ ★ ☆


Danielle 


Thursday, 18 July 2013

Follow Your Dreams

Hello Beauties,

I've decided to call this segment of my blog, the good, the bad and the dragon lady because not everything in makeup is a glamour fueled party, it's a lot of hard work, long days, sleepless nights and living pay cheque to pay cheque. It is labour Intensive, but it is a labour of love.

This post in particular is something near and dear to my heart and it begs the question, how does one successfully balance their career with their family.  As so many others before me, I found out I was pregnant while I was in college. I finished what I could of my degree before I was blessed with a beautiful baby girl, I traded in the sleepless nights spent studying and doing homework for 3am feedings and dirty diapers. I have never regretted a single minute of it, my daughter is my world and i love her to death, however now I am left with the task of trying to begin a career in a demanding and competitive field while still trying to be mommy dearest.

Finally after a year of networking and putting myself out there I have been given the opportunity to begin a career with a major and world renowned cosmetics company, but I find that as my third and final interview date slips ever closer I am doubting my decisions to pursue this opportunity.


 Children should not be a deterrent from following your dreams, they might change what your dreams look like, but they should give you more purpose to chase them. I feel that I have to pursue my dreams, I owe it to myself and to my daughter. I have to prove not only to myself, but to her as well that you can always follow your dreams,it might take a little extra work, but it will be worth it in the end.

That being said I don't want anything to take away from my daughter's happiness, or to harm the relationship that we have now, and I honestly don't know how often this new career choice is going to keep me away from home, and my family.

I'd love to hear your views on this


Danielle

Tuesday, 10 July 2012

In The Beginning

NOBODY TELLS THIS TO PEOPLE WHO ARE BEGINNERS, I WISH SOMEONE TOLD ME.
All of us who do creative work, we get into it because we have good taste.
But there is this gap. For the first couple years you make stuff, it’s just not that good.
It’s trying to be good, it has potential, but it’s not.
But your taste, the thing that got you into the game, is still killer. And your taste is why your work disappoints you.
A lot of people never get past this phase, they quit.
Most people I know who do interesting, creative work went through years of this.
We know our work doesn’t have this special thing that we want it to have. We all go through this.
And if you are just starting out or you are still in this phase, you gotta know its normal and the most important thing you can do is do a lot of work.
Put yourself on a deadline so that every week you will finish one story [or project].
It is only by going through a volume of work that you will close that gap, and your work will be as good as your ambitions.
And I took longer to figure out how to do this than anyone I’ve ever met.
It’s gonna take awhile.
It’s normal to take awhile.
You’ve just gotta fight your way through.

-Ira Glass

Tuesday, 20 March 2012

Guide To: Essential Oils

Hello Beauties,


Saddle up, this is going to be a long one!  


As part of my course I am also studying essential oils and all the amazing healing properties that they have.  This post is going to be about some of the most common essential oils and the different amazing things they can do for the body. 


Please understand that this is meant to be taken as a GUIDE ONLY, and that further independent research should be done if you want to start healing with essential oils. Secondly, essential oils are not meant to be placed directly on the skin without being diluted in a carrier oil; as they penetrate into the blood stream and can have the opposite effect of what you want. You also have to be very careful about using essential oils on the skin when you are pregnant as some oils can cause harm to the fetus.  Lastly you must use ALL NATURAL essential oils, synthetic essential oils can make you very sick and will often have the opposite to desired effect on your body.


I am going to break the oils down into 3 different categories soothing, grounding, and stimulating.


Soothing 


Lavender
Properties


Fresh herbaceous- floral, balsamic undertones
Native to the high mountains of southern France
bathing, soothing, disenfecting
soothing to the nervous and digestive systems


Therapeutic Uses 


1 drop of oil to 1 cup of water as an antiseptic
Lavender, chamomile, bergamot, neroli, into a carrier oil helps with eczema, psoriasis
Lavender and rosemary for healthy hair
Up to 20 drops in the tub for soothing bath
Lavender and geranium or eucalyptus to stimulate the immune system
A few drops placed on a warmer before bed to sooth/calm


Chamomile
Properties


Sweet, fruity, herbaceous
Native to Hungary & Egypt
Over 100 uses (national institute of health)
Calming, soothing
Helps sooth headaches & migraines
Good for allergies and sensitive skin


Therapeutic Uses


Used with lemon or honey for sleep
helps with ear aches/infections 
Chamomile, honey, rose, sandalwood, geranium in distilled water for sensitive skin
Blends well with bergamot, clary, sage, lavender, jasmine, geranium, grapefruit, tea tree, rose, lemon, lime and yang-ylang oil. 


Jasmine
Properties


Powerful, warm, floral, herbaceous-fruity undertones
Native to Egypt & Turkey
Vines are from the olive family
Considered an aphrodisiac


Therapeutic Uses
Can be used in wound healing
Acts as an antidepressant
Considered an antiseptic
Blends well with bergamot, sandalwood, rose
Also blends with citrus fruits such as orange, lemon, lime and grapefruit


Ylang-Ylang
Properties


Powerful, sweet, floral
Native to Commores, Indonesia, & Philippines
Oils derived from flowers of a tropical tree


Therapeutic Uses


Can be used as a sedative
Considered to be an aphrodisiac
Soothes insect bites
Blends well with bergamot, grapefruit, lavender and sandalwood


Grounding Oils


Geranium
Properties


Powerful, green-leafy, rosy with fruity undertones
Native to southern Africa
AKA Cranesbill, storkesbill
Calming, balancing, uplifting
Antioxidant, Antiseptic, Astringent


Therapeutic Uses


Refreshing bath oil
Blends well with rose, citrus, basil
Commonly found in cosmetics as an astringent
Good for oily/dry skin
1 drop in 1 cup of water can be used to treat sores around the mouth and eyes
Can be used on a warmer to cleanse the air


Cypress 
Properties


Sweet, balsamic, reminiscent of pine needles
Native to Cypress Island
Considered a "supportive oil"


Therapeutic Uses


Astringent and contractions good for teeth, skin and muscles
Cypress/ Hyssop for relief of hay fever
Antiseptic for internal and external wounds
Good for oily skin
Best in a warmer in the winter


Sandalwood
Properties


Soft, woody, persistent
Native to India
Used for everyday religious rituals
Used for embalming (believed to carry the soul into the next life)


Therapeutic Uses


Grounding
Acts as a memory booster
Used in sensitive skin care
Used in eczema treatments
Can help with over exposure to sun
Used to help with fever, burns, and to reduce sweating
Blends well with bergamot, black pepper, geranium, lavender, myrrh, rose, vetiver and ylang-ylang


Stimulating


Eucalyptus
Properties


Pungent, camphoraceous, spicy
Native to Australia
Worlds fastest growing trees
Cough,cold and sinus remedy


Therapeutic Uses


Can be inhaled or rubbed on the chest as a respiratory aid
Blends well with juniper and lavender
Effective rub for joints and muscles
Can be used as an antiseptic bath
1 drop with honey, or on a sugar cube can be used as an antiseptic / diuretic
Can be used on a warmer during flu season


Rosemary
Properties


Fresh, herbaceous, woody
Native to Mediterranean region
Associated with mind, body, adrenals, and memory


Therapeutic Uses


**CAUTION** NOT DURING PREGNANCY (Seizures and high blood pressure)
Blend with lavender for hair conditioner
1 drop on top of the head in the shower as a stimulant
on a warmer in the morning
Very strong stimulant
Brain and nerve tonic
Blends well with frankincense, lavender, clary, sage, cedarwood, basil, thyme, citronella, lemongrass, elemi, geranium, chamomile, peppermint and cardamom


Lemon
Properties


Fresh, sweet, reminiscent of the peel
Native to Asia
Stimulates the nervous system


Therapeutic Uses


Antiseptic, bactericidal
Detoxification and purification for the body
Astringent for infectious diseases
Treats wrinkles and brown spots
Lemon with olive oil or honey in water speeds up the digestive system
Lemon and water for detoxification
On a warmer to stimulate
Blends well with lavender, rose oil, neroli, sandalwood, geranium, ylang-ylang, tea tree oil


Peppermint 
Properties


Powerful, minty, herbaceous, balsamic, sweet undertones
Native to Europe and Asia
Referred to as the worlds oldest medicine


Therapeutic Uses


Good for respiratory system
Antiseptic, sedative and cooling properties
Contains mineral nutrients
Good for indigestion and upset stomach
Blends well with eucalyptus, rosemary, lemon and marjoram


Tea Tree
Properties


Warm-spicy, fresh, camphoraceous
Native to Australia


Therapeutic Uses


Antibacterial, antimicrobial, antiseptic, antiviral, fungicide
Zit zapper
Can be added to laundry to remove odours
Added to shampoo to prevent head lice
blends well with cinnamon, clary sage, clove, geranium, lavender, lemon, myrrh, nutmeg, rosewood, rosemary, and thyme


Hope this was helpful 
Thanks for reading beauties


Danielle


Wednesday, 14 March 2012

How To: Conceal a Tattoo

Hello Beauties,

Tattoos are beautiful pieces of art as well as tools of self expression; but let's face it, not everyone likes them.  There is still a certain stigma attached to having a tattoo and there may come a time when you find yourself in need of a way to cover a tattoo (a family gathering perhaps ;P).

Covering a tattoo is all about layering, usually it takes about 3 layers to completely cover a tattoo.  The degree of difficulty for covering a tattoo depends on 3 things :

  • The size of the tattoo
  • The skin colour of the person with the tattoo                             
  • The number of colours that the tattoo has within it

You will need:

  • A foundation brush
  • A concealer brush
  • Corrector
  • Concealer
  • Foundation
  • Setting powder
  • Moisturizer
  • Cleansing wipes
  • Primer (Optional)
  • A colour wheel (optional, but good to have)

To Start, Prep the Skin:
To prep the skin, wipe the tattooed area with a cleansing wipe, then apply moisturizer and let it absorb for 5 minutes.  Once the moisturizer has absorbed into the skin apply a primer (I use GOSH velvet finish primer), if you're not using primer then apply a corrector to the tattooed area. 
**To Choose a Corrector**  - Look at the person's skin tone, determine if they have a warm, or cool undertone (pink, or yellow undertone). Choose a corrector that is slightly more pink, or slightly more yellow than the persons skin. Then choose a corrector that will cancel out most of the colour in the tattoo (IE, for a black tattoo on fair skin, try using a white eye shadow base). You don't have to buy a corrector palette to make this work, you can use a concealer to act as a corrector.  My Pick - MAC Studio fix foundation and concealer 

The first layer should be layer that cancels out the colour in the tattoo (IE white layer for a black tattoo). While applying the corrector, make sure to concentrate the product in the center of the tattooed area;  you want to make sure you have room to blend the product out.  I like to use a sponge for the first layer; Remove some of your chosen corrector with a spatula, or the tip of your brush and apply it to the center of the tattooed area.  Take a sponge and dab through the product to the outer edges of the tattoo.  Once there is a good layer of product covering the tattoo (at this stage the tattoo should be visible, but not prominent) cover the entire area with a finishing powder.  My pick - MAC prep and prime loose powder, I like the loose powder because you can sprinkle it onto the tattoo and brush away the excess without moving any of your corrector away. Give your first layer a few minutes to set before you begin applying the next. 
Once the corrector has been set, begin to apply your concealer with your concealer brush. As with the first layer, try to concentrate your product on the center of the tattooed area so you have room to blend out.  
**TIP** - Try to avoid over touching the concealed area with the brush, the more you touch it, the more likely it will be to smudge and remove product 
At this point, the tattoo should not be visible, powder the concealer layer and give it a few minutes to set. 
Once the concealer is set, go over the area with foundation that matches the skin tone. As with all the other layers, start in the center of the tattooed area and blend out using gentle brush strokes.  Touching the area to much or too briskly will remove product and smudge the layers.  Powder the entire area and wait a few minutes to set. 

Don't be shy about adding extra layers, if you notice that one of the layers didn't cover the way you wanted them to, powder, and repeat that layer using the same steps.  

To finish the look (if you think you need it) try adding some bronzer.  Gently sweep bronzer over the concealed area to add some life.

Before
After
Thanks for reading


Danielle

Monday, 12 March 2012

How To: Make at Home Facials

Hello Beauties,


Facials are a great way to keep your skin glowing, but they can be pricey. We asked Louisa Macan-Graves, author of Hollywood Beauty Secrets: Remedies to the Rescue, and Elda Argenti, owner of the Plantogen skincare line, for their favorite make-at-home face masks crafted from common household ingredients.


For All Skin Types

Brighten: Cut a slice of ripe papaya and remove the seeds and pulp (save the pulp for a snack later—it’s great for digestion). Rub the inside of the papaya peel on your cleansed face, focusing on lines around the mouth and eyes, crow’s feet, thinning temples, neck and hands. Let it dry for 15 to 20 minutes, then rinse with tepid water. This mask can be done twice a week. “The enzymes in papaya exfoliate, repair sun damage, diminish age spots and smooth skin. Your skin will look brighter, with a more polished finish,” says Macan-Graves.


ExfoliateCombine 1 tsp honey and 1 tsp olive oil. Separately, prepare a packet of plain oatmeal, using less water than called for so it forms a thick paste. Next, add the honey and olive oil mixture to the cooked oatmeal. Apply as a scrub, gently rubbing it in small circles over your skin, avoiding the eye area. Rinse off with warm water and pat dry. This mask can be done twice weekly. “The oatmeal in this scrub exfoliates, while the honey and olive oil moisturize,” says Argenti.


Cleanse“Believe it or not, I love to cleanse with oil,” says Argenti. For this facial, she combines 1 Tbsp plain Greek yogurt with 2 tsp olive oil and 1/2 tsp lemon oil (not to be confused with lemon juice; lemon oil is an essential oil that can be found at health food stores). The mixture should be a little bit runny but not easily poured out. Massage it over skin, then immediately wipe it off with a washcloth soaked in tepid water. This can be done daily. “You want to use good-quality oil and you’ll be surprised at how clean your skin will feel,” says Argenti. “You don’t need a harsher product, even for skin with acne. Just be careful around the eye area…[the mixture] tends to be very sticky.”


For Oil- and Blemish-Prone Skin

Lift & TightenCombine 2 Tbsp plain yogurt with 1 Tbsp fresh lemon juice (the juice of one lemon) and apply to your cleansed face and neck. Let it dry for 20 to 30 minutes. You’ll feel the mask tighten on your face and neck, which creates a lifting and firming effect. Leave it on longer (up to one hour) for even more face-lifting effects. Once done, rinse with tepid water followed by a cool rinse. This mask can be done two to three times a week or whenever you need a face lift. “This instant face-lifting mask helps fade age-spots, acne scars and even helps keep blemishes and acne in check. It also gets rid of uneven-looking skin tone,” says Macan-Graves.


Tone: This toning eye treatment helps to “de-puff, relax, refresh and energize your skin,” says Argenti. “It’s much more cooling than the traditional cucumber slices.” After cleansing your skin, brew a cup of chamomile or green tea and allow it to cool. Then soak two clean, round makeup sponges in the tea and squeeze out any excess liquid. Place one on each of your eyes for 15 minutes. Do this daily. “You need to use an alcohol-free toner on your skin to cleanse and tighten pores. Alcohol is very detrimental, and tea works just as well,” adds Argenti.


For Dry Skin

Soothe: Combine 2 Tbsp honey with 1 Tbsp apple cider vinegar or lemon juice. Apply to your clean face and leave on for 20 minutes. Rinse with tepid water followed by a cool rinse. This can be done three times a week. “This mask heals, moisturizes and balances the pH of the skin,” says Macan-Graves. “Honey is a humectant and natural antibiotic that heals and moisturizes. Apple cider vinegar helps balance the pH of skin and soothes damaged skin.”

MoisturizeMacan-Graves recommends oatmeal and fennel to help moisturize dry skin. Grind 1 Tbsp oatmeal in a blender and set aside. Add 1 Tbsp fennel seeds to 1/2 cup boiling water to make a tea. Allow the seeds to steep for 10 minutes; strain the seeds and discard. Let it cool down to room temperature and then combine 1 Tbsp of the fennel tea with 1 Tbsp ground oatmeal and 1 Tbsp honey. Apply the mixture to your clean face and leave on for 20 minutes. Rinse with tepid water followed by a cool rinse. This mask can be done twice weekly.

BrightenCombine 2 Tbsp sour cream with 2 Tbsp honey and 1 Tbsp apple cider vinegar or lemon juice. Apply to your cleansed face and leave on for 20 minutes. Rinse with tepid water followed by a cool (not cold) rinse. This mask can be done twice a week. “This mask heals, exfoliates, brightens and moisturizes skin. It refines pores, fades acne marks and prevents blemishes from coming up,” says Macan-Graves.


Let mek now if you try any of these out. I'd love to hear your reviews of them :D

As always, Thanks for reading beauties,


Danielle


Adapted from:  Womans Day